
Expansion Joints in Concrete, and How to Eliminate Them
What expansion joints do, how they are spaced, why they leak, and the mechanical rebar splice that removes the joint entirely on reinforced and post-tensioned structures.
Most guides tell you how to detail an expansion joint. We question whether you need one.
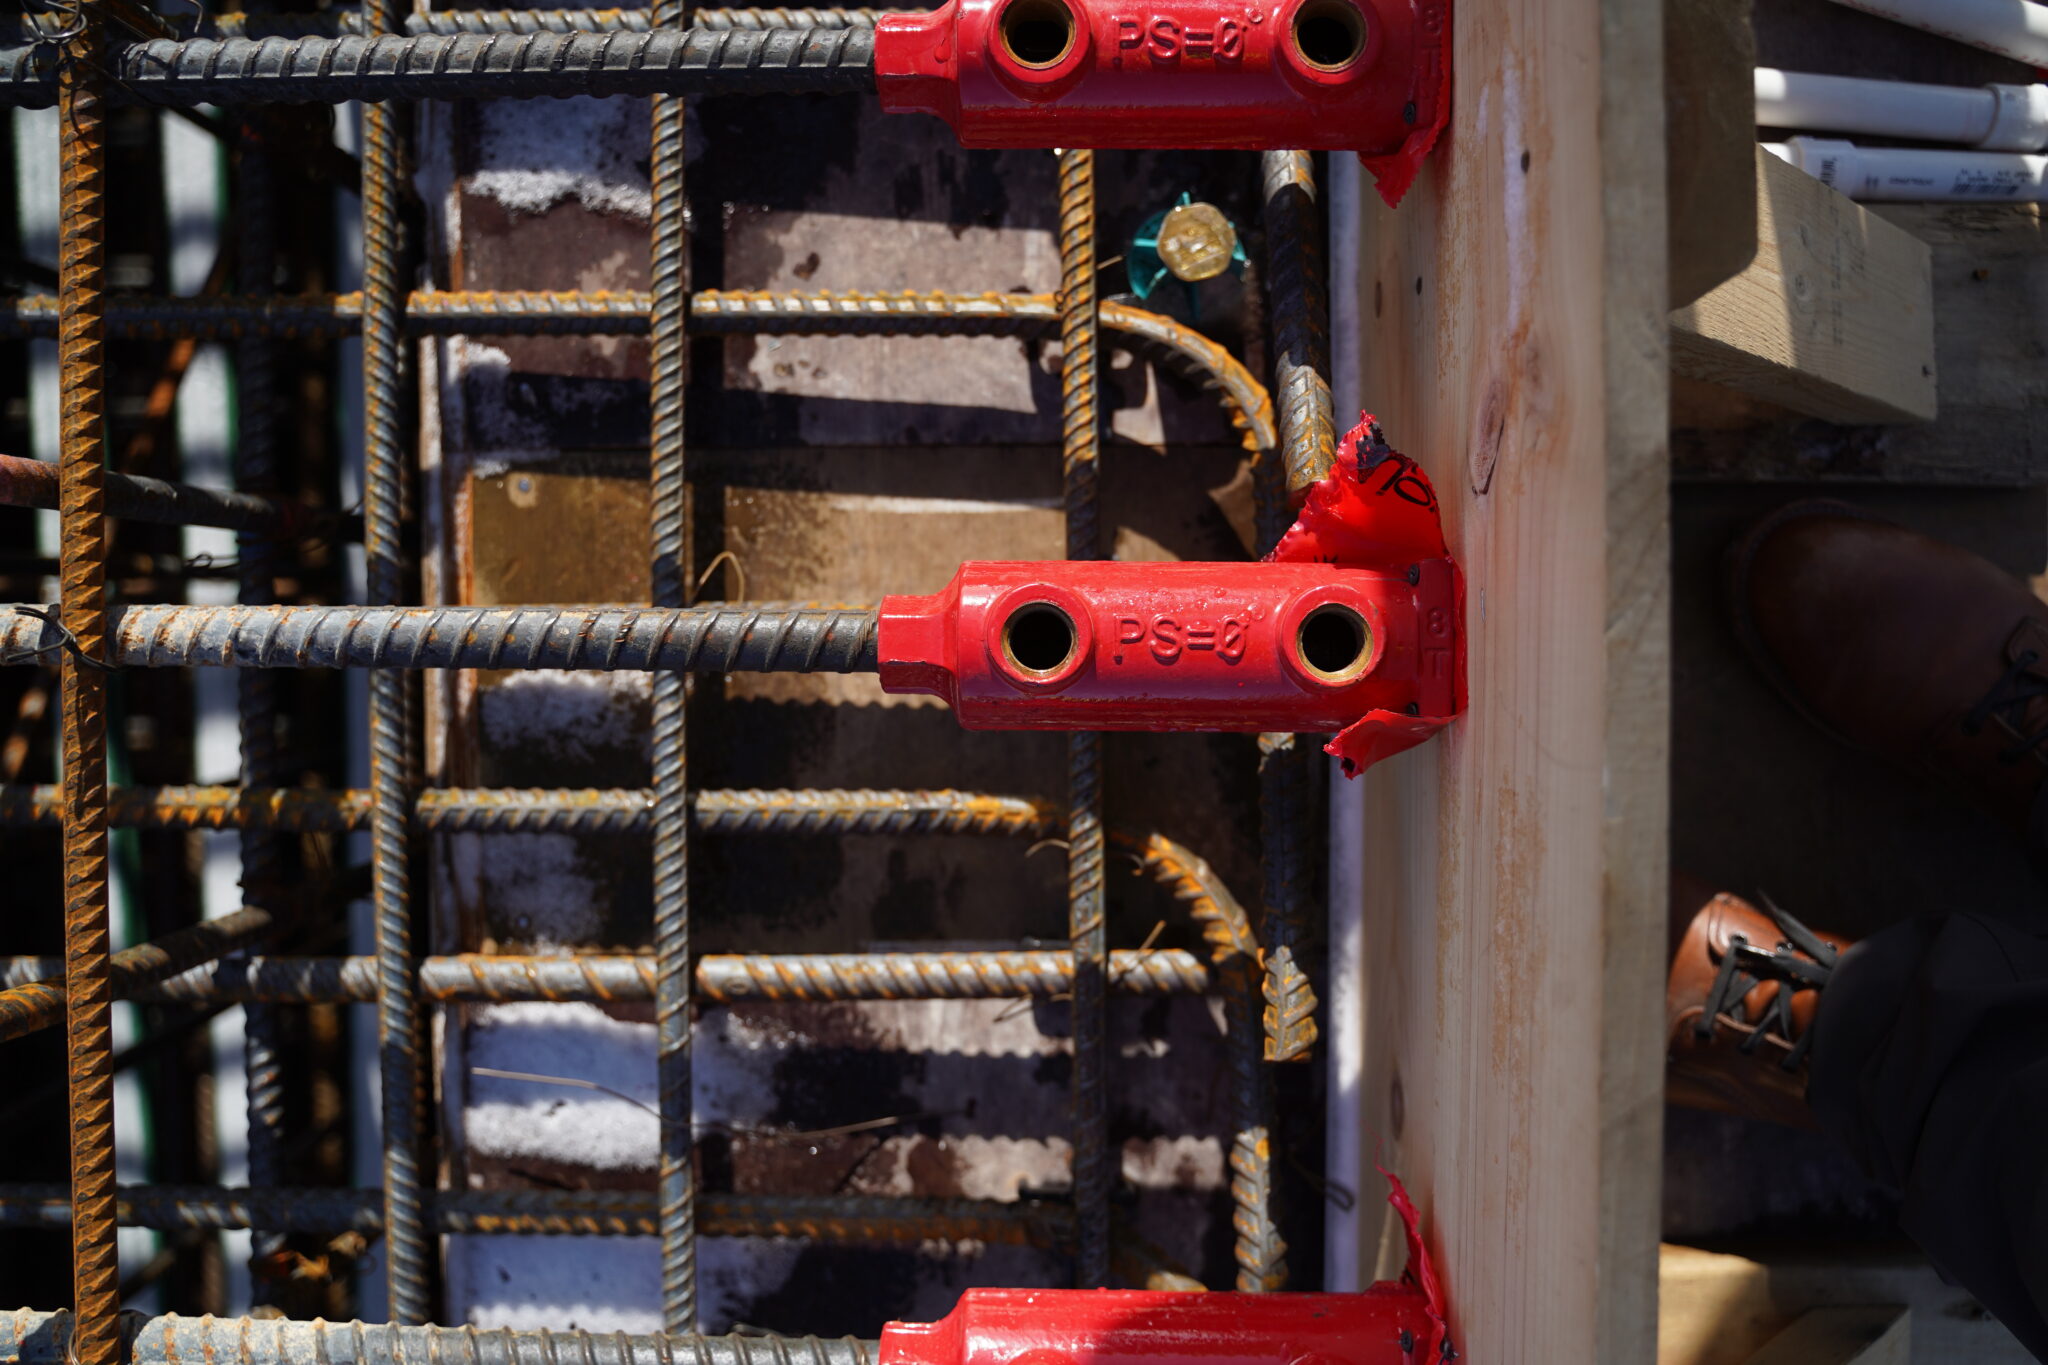
Expansion joints in concrete are the deliberate gaps that let adjoining slabs move as concrete shrinks during curing and swells or contracts with temperature. They are one member of the broader family of joints that accommodate slab movement, alongside control and construction joints. Every other explainer stops at spacing rules and sealant selection. Ours starts from a different question that our engineers ask on live commercial decks: once a self-supporting mechanical splice can carry the reinforcement across the seam, does the open joint need to exist at all? PS=Ø was engineered by a team with over 45 years of structural experience to eliminate pour strips and expansion joints, and it is an ICC Approved, ACI 318 Type 1 and Type 2 compliant mechanical rebar splice.
What is an expansion joint in concrete?
An expansion joint is a full-depth gap left between two concrete placements so the slabs can move independently. Concrete shrinks measurably as it cures and moves again with every temperature swing. The joint gives that movement somewhere to go, and a compressible filler or sealant keeps water and debris out of the gap. Without it, restraint-to-shortening forces build up and crack the slab at the weakest point.
That is the opening PS=Ø was built for. Instead of leaving the gap open and sealed, the reinforcement is spliced mechanically across the seam. The slab still shortens and cures naturally, then the couplers are grouted to complete a continuous connection. You can see the full assembly on our system page, where the same mechanical rebar splice replaces traditional pour strips and expansion joints.
How far apart should expansion joints be in a concrete slab?
Spacing is a structural decision, not a rule of thumb. It follows from slab thickness, mix design, the restraint conditions at columns and walls, and the temperature swing the structure will see. That is why the engineer of record sets it, and why two decks of the same size can call for very different layouts. The variables that drive the spacing decision:
- Restraint-to-shortening. Stiff cores, shear walls, and columns fight the slab as it shrinks. The stiffer the restraint, the more the detailing has to relieve it.
- Mix and curing. Higher-shrinkage mixes and short curing windows move more, sooner, which pushes joints closer together.
- Thermal exposure. Exposed decks and podium slabs cycle harder than conditioned interior floors.
- Post-tensioning. PT slabs shorten dramatically at stressing, so the movement to accommodate is larger and the detailing more demanding.
"The better question is not how often to interrupt the slab. It is whether the interruption has to stay open once a self-supporting splice can carry the reinforcement across it."
PS=Ø lets the slab go through more natural volume change without schedule risk, which is why field teams reach for it on tight sites. Our engineers can review your detailing and delegated design. Read how they approach it on the engineer impact page, or call (800) 355-8414 to talk through a specific layout.
Expansion joints vs control joints vs construction joints
All three interrupt the slab, but they solve different problems. A control joint decides where a crack goes. A construction joint marks where one pour ended and the next began. An expansion joint leaves a real gap so sections move independently. The distinction that matters to a structural engineer is whether reinforcement has to be carried across the interruption, because that is the case PS=Ø addresses.
| Joint type | What it does | Why it exists | Carries rebar across? |
|---|---|---|---|
| Control joint | Tooled or sawn weakness that steers cracking to a planned line | Shrinkage cracking is inevitable, so it is directed instead of resisted | Usually not full depth |
| Construction joint | Interface where one placement stops and the next begins | A pour was too large to finish in one placement | Yes, typically doweled or lapped |
| Expansion joint | Full-depth gap letting sections move independently | Relieve restraint-to-shortening and thermal movement | Left open and sealed |
| PS=Ø splice | Mechanical rebar splice that lets the slab move, then grouts to a continuous connection | Remove the open joint while keeping the movement | Yes, and eliminates the gap |
Why do concrete expansion joints crack and leak?
The concrete is rarely the culprit. The failure starts at the sealant, and once water gets into the gap the damage compounds. On a structural deck that water eventually reaches the reinforcement, which is where a cosmetic problem turns into a durability problem. Here is how a conventional expansion joint typically fails.
The sealant is a consumable
Joint sealant hardens, shrinks, and pulls away from the joint face over time. It was never meant to last the life of the slab, which is why it lands on the maintenance schedule.
Movement never stops
The joint opens and closes with every thermal cycle. Each cycle works the sealant loose a little more until the bond breaks and the gap is open to water.
Water reaches the rebar
Once water sits in the gap, freeze-thaw widens the crack and, on a structural deck, corrosion reaches the reinforcement. That is the failure a grouted splice removes by closing the seam.
A joint that is designed out with a grouted mechanical splice has no open sealant line, so there is nothing on the surface to fail. That is the durability case for eliminating the joint rather than committing to maintain it for decades.
How to eliminate expansion joints with a mechanical rebar splice
PS=Ø replaces the open joint with a self-supporting mechanical splice. The slab still shortens and cures on its own timeline, so you keep the movement the joint was there to provide, then the connection is completed and the seam closes. Here is the sequence at a high level.
- 1
Engineered shop drawings
Our engineers detail the splice into your structural design so it carries the reinforcement across the seam and holds the structural intent the joint would have compromised.
- 2
Couplers set in place of the joint
The couplers and closure strip go in where a pour strip or expansion joint would sit, so crews are not leaving an open gap and exposed rebar on the deck.
- 3
The slab shortens and cures naturally
The concrete goes through its natural volume change off the critical path. No rushing the cure, no waiting on a delay-strip pour back to keep the schedule moving.
- 4
Grout the couplers to close the seam
Once shrinkage is complete, the couplers are grouted to finish a continuous, ICC Approved, ACI 318 Type 1 and Type 2 compliant connection. The joint is gone.
The method has been used to eliminate joints on live commercial jobsites including Gaylord Pacific, The Ottawa Hospital, and IU Health Downtown. See more on the case studies page, then call (800) 355-8414 to talk through your structure.